-
Your shopping cart is empty!


27 Feb

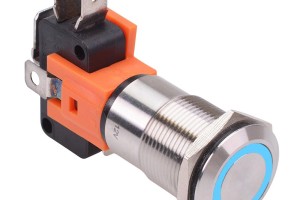
In the world of electronics, DIP switches play a vital role, allowing for quick and easy hardware configuration.
DIP switches, or Dual-In-Line Package switches, are a series of tiny toggle switches that can be set to specific positions, enabling a range of hardware settings and configurations. Whether you're a seasoned electronics enthusiast or a newcomer to the field, this guide will have you connecting DIP switches like a pro.

Preparing for the Connection
Before we dive into the actual connection process, it's essential to ensure you have the right tools and materials. Here's a checklist to get you started:
DIP Switch: Make sure you have the correct DIP switch for your project. DIP switches come in various sizes and configurations, so choose one that matches your requirements.
Soldering Kit: You'll need a soldering iron, solder, and possibly a soldering station to keep your iron at the optimal temperature.
Safety Gear: Don't forget to wear safety glasses and use a fume extractor or work in a well-ventilated area to avoid inhaling soldering fumes.
Circuit Board: You'll be connecting the DIP switch to a circuit board, so make sure you have one ready.

Step-by-Step Guide to Connecting a DIP Switch
Now that you're prepared, let's walk through the steps of connecting a DIP switch:
Identify the Connection Points: Locate the designated pins on your circuit board where the DIP switch will be connected. These are typically labeled or marked in some way.
Align the DIP Switch: Gently place the DIP switch over the corresponding pins on the circuit board. Ensure that each pin of the DIP switch aligns perfectly with the board's pins.
Solder the Connections: Using your soldering iron, carefully apply the solder to each pin, securing the DIP switch to the circuit board. Be sure to use enough solder to create a strong connection, but not too much to avoid creating shorts.
Inspect Your Work: Once you've soldered all the pins, inspect your connections. Look for any loose connections, bridges (where the solder has connected two adjacent pins), or other potential issues.
Test the DIP Switch: After ensuring your connections are solid, it's time to test the DIP switch. Power up your circuit and toggle the switches to verify that they function as intended.

Tips and Precautions
Take Your Time: Soldering and electronics work requires precision. Don't rush the process; patience is key.
Heat Management: Keep your soldering iron at the recommended temperature to avoid damaging components or creating weak solder joints.
Ventilation: Remember to work in a well-ventilated area to minimize exposure to soldering fumes.
If you want to learn more about related content, please continue to follow our official website: www.socoje.com
Leave a comment